How to Merge Git Branches to Avoid Conflicts
When working with Git, merging branches is a common task to combine changes from different branches into one. However, conflicts can arise when Git detects conflicting changes in the code. In this step-by-step guide, we will explore how to merge branches in Git while minimizing conflicts.
Table of contents
- Ensure Your Branch is Up to Date
- Synchronizing with
git pullto Ensure Up-to-Date Merging - Handling Potential Conflicts
- Test Your Changes
- Commit the Merged Changes
- Push Your Changes
- Verify the Merge
- Conclusion
Ensure Your Branch is Up to Date
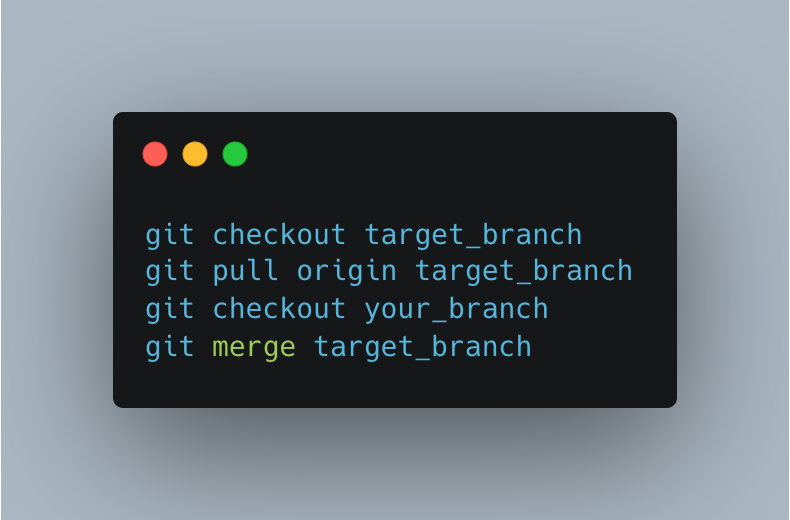
Before merging, ensure that your current branch is up to date with the latest changes from the target branch. Execute the following commands:
1
2
3
4
git pull # on your current branch
git checkout target_branch or git switch target_branch
git pull origin target_branch
git checkout your_branch
These commands switch to the target branch, pull the latest changes from the remote repository, and switch back to your branch locally.
In the given example, the
target branchrefers to the branch from which you want to merge changes, while theyour branchrefers to the branch where you want to incorporate those changes.
Synchronizing with git pull to Ensure Up-to-Date Merging
You can use git pull origin target_branch from your_branch when you want to fetch and merge the latest changes from the target_branch into your current branch (your_branch). This can be useful in scenarios where you want to ensure that your branch is up to date with the latest changes from the target_branch before merging them.
Fetching and Merging in a Single Step
Using git pull origin target_branch from your_branch performs two actions:
- It fetches the latest commits and updates the remote-tracking branch (
origin/target_branch) with any new changes from the remote repository (origin). - It merges the changes from
origin/target_branchinto your current branch (your_branch).
This sequence of commands combines the git fetch and git merge operations into a single step.
Benefits of Keeping Branches in Sync
By executing git pull origin target_branch from your_branch, you ensure that your local branch is synchronized with the latest changes from the target_branch. This helps prevent any conflicts that may arise due to diverging code paths and allows you to have an up-to-date starting point for further development or merging.
Handling Potential Conflicts
It’s important to note that when using git pull, there is a possibility of conflicts occurring during the merge operation. If conflicts arise, you will need to resolve them manually following the usual conflict resolution steps.
Therefore, it’s recommended to carefully review the changes and test your code after executing git pull to ensure a smooth merge process.
Common Types of Conflicts
Git conflicts can occur when merging or rebasing branches with conflicting changes. Here are some common types of conflicts that can arise:
Content Conflict: This is the most typical type of conflict where Git identifies conflicting changes to the content of a file. It occurs when different branches have made modifications to the same lines of code.
Rename/Move Conflict: When one branch renames or moves a file, while another branch modifies the same file, a conflict can arise due to the conflicting operations.
Delete/Modify Conflict: If one branch deletes a file or a specific line of code, while another branch modifies the same file or line, Git may encounter a conflict.
Branch/Commit Conflict: When two branches have diverged and there are conflicting commits between them, Git will need to reconcile these differences during a merge operation.
Binary File Conflict: Conflicts can also occur with binary files, such as images or compiled binaries, when both branches attempt to modify the same file. Git may not be able to automatically resolve these conflicts, requiring manual intervention.
Whitespace Conflict: Git can flag conflicts due to whitespace changes, such as tabs vs. spaces or trailing whitespace, if these changes occur on the same lines in conflicting branches.
These are just a few examples of common conflicts encountered in Git. The specific conflicts you encounter may vary depending on the nature of the changes and the branching workflow being used.
Resolve Conflicts Locally
If conflicts occur during the merge, Git will mark the conflicting areas in your code. Open the affected files in a text editor and locate the conflict markers (<<<<<<<, =======, >>>>>>>). These markers indicate the conflicting sections.
To list all conflicts in a Git repository, you can use the following command:
1
git diff --name-only --diff-filter=U
This command will display the names of all files that have conflicts in the repository. The --name-only option ensures that only the filenames are shown, and the --diff-filter=U option filters the output to only display files with unresolved conflicts.
Running this command will provide you with a list of files that require conflict resolution. You can then proceed to address each conflict individually by editing the files, resolving the conflicting sections, and committing the changes.
For example, let’s say you have a conflict in file.cpp:
1
2
3
4
5
6
7
<<<<<<< HEAD
// Your changes
int myVariable = 42;
=======
// Target branch changes
int myVariable = 24;
>>>>>>> target_branch
The code snippet demonstrates a common conflict resolution scenario in Git.
<<<<<<< HEAD: This marker indicates the beginning of the conflicting code block that exists in the current branch (HEADrepresents the latest commit in the current branch). The code between<<<<<<< HEADand=======represents your changes in the current branch.// Your changesint myVariable = 42;: This section contains the code that you introduced or modified in the conflicting file. In this case, it sets themyVariablevariable to the value42.=======: This marker separates the conflicting code sections.// Target branch changesint myVariable = 24;: This section contains the conflicting code from the target branch (target_branchin this example). It sets themyVariablevariable to the value24.>>>>>>> target_branch: This marker indicates the end of the conflicting code block from the target branch.
During a Git merge or rebase operation, if conflicting changes are detected in the same section of a file, Git inserts these conflict markers to highlight the conflicting sections. It’s your responsibility to manually resolve the conflict by choosing which changes to keep or modifying the code accordingly.
Manually modify the code to resolve the conflict
To resolve this conflict, you would typically edit the code manually, removing the conflict markers (<<<<<<< HEAD, =======, >>>>>>> target_branch), and making the necessary adjustments based on your desired outcome.
In this case, you might choose to either keep your changes (int myVariable = 42;) or use the target branch’s changes (int myVariable = 24;), depending on your specific requirements and intentions.
1
2
// Resolved conflict
int myVariable = 42;
After resolving the conflict, you would save the changes, commit them, and continue with the merging or rebasing process in Git. Make sure to carefully review the changes to preserve the intended functionality.
Test Your Changes
After resolving conflicts, it’s crucial to test your changes to ensure they work as expected. Run unit tests, execute the code, and perform any necessary manual testing. Confirm that the merged code behaves correctly and doesn’t introduce new issues.
Commit the Merged Changes
Once you have resolved conflicts and tested your changes, it’s time to commit the merged code. Use the following command:
1
git commit -am "Merge target_branch into your_branch"
Provide a meaningful commit message describing the merge operation. Be sure to mention the branches being merged for clarity.
Push Your Changes
To make the merged code available to others, push your changes to the remote repository. Use the command:
1
git push origin your_branch
This will push your merged branch to the remote repository, allowing other team members to access and review the changes.
Verify the Merge
Once your changes are pushed, it’s a good practice to verify that the merge was successful. Review the merged code in the remote repository, inspect the commit history, and consider conducting additional tests to ensure the intended changes are properly reflected.
For example, you can check the commit history using:
1
git log
Conclusion
Merging Git branches while avoiding conflicts is an essential skill for effective collaboration in software development. By following the steps outlined in this guide, you can successfully merge branches, resolve conflicts, and maintain a clean and stable codebase.
Remember to update your branch, resolve conflicts locally, test your changes, commit the merged code with a descriptive message, push the changes to the remote repository, and verify the merge. Following these steps will help you minimize conflicts and streamline your Git workflow.
Happy merging!